mr handyman franchise Mr Handyman

What are You Looking for in a Handyman Franchise Business?

April 30th, 2013

That’s the most important question you can ask yourself. Do you want freedom, or financial security, or a flexible schedule, or control of your future, or the satisfaction knowing that you’re putting money in your pocket and not in someone else’s? Whatever your purpose it’s best to have that settled before you investigate a franchise business. Two new Mr.2013 Mr. Handyman Franchise 500 Handyman franchise owners did their homework before they made a call.


New owner Van Jackson, Mr. Handyman of San Antonio North Suburbs, was always intrigued by the handyman business. “I’m a do-it-yourselfer,” said Van. He graduated from the UNew owner Van Jackson, Mr. Handyman of San Antonio North Suburb handMr. Handyman Business franchiseyman business, was always intrigued by the university of Texas, Austin, and went to work in data processing for a bank in Houston where he met Debra. She’s still in banking in treasury management. Van left the bank after 10 years and spent 20 years with Electronic Data Systems in computer services. After EDS, he opened his own window covering business. “It was difficult during the recession. My skill set is customer service, and I found I needed help in areas like internet marketing and Website development. I saw a Mr. Handyman van, went to the Website and made a call.” Greg Kemp, Mr. Handyman of Ann Arbor, Saline and Chelsea, earned a Marketing degree from Eastern Michigan University. He spent the first 15 years of his career as a golf professional, operating golf facilities in Arizona and Texas. He parlayed his business management experience and went to work for Brinks Home Security as a sales representative and advanced to regional director before leaving for Devcon Security. 

Mr. Handyman Franchise Owner of Ann Arbor Greg Kemp

As general manager of its Detroit territory responsible for two branches and 20 employees. “I wanted to join a franchise system that had exceptional marketing support. When I spoke with Mr. Handyman owners, I heard two themes: They were all positive about the marketing, and they all said the support from the home office and sharing of best practices among the owners was outstanding—and it has been.” Van and Greg made the right decisions for them. You can make the best decision, too, if you know what you are looking for

Greg Kemp and Van Jackson kicked off the new year with Service Brands International. They each attended new owner training respectively in December 2012 and January 2013, where in that time frame SBI graduated and welcomed three new Mr. Handyman franchise business owners into the family and welcomed ten new franchise businesses system wide. Craig Donaldson, the CEO of Service Brands International has shared the SBI growth goal for 2013 is to increase new business with all brands by 75% over last years numbers and this new training class sets us in the right direction.

Service Brands International 2013 New Franchise Owner Training Class

If you are excited about the opportunty to take control of your scheduale and have more time back in your life, learn more about franchising and discover what it takes to become part of the Mr. Handyman Franchise family.

Top 10: pumpkin carving tips

September 21st, 2012

by Roxanne Fisher – Writer/Sub-editor, bbcgoodfood.com 

www.bbcgoodfood.com/blog/582-pumpkin-carving/

However you choose to celebrate 31st October, there is one tradition that will generally precede all festivities. The self-carved Jack o’lantern is something of a Halloween pin-up, but how will you make yours stand out from the crowd? Our simple four-step guide will get you started, but here are our top 10 tips for giving your pumpkin a touch of magic…

Open quotationHow will you make yours stand out from the crowd?Close quotation

1. Choose your pumpkin wisely. The lines on the skin could be a witch’s wrinkles while a misshapen squash could provide a devilishly different canvas.

2. Use a template to perfect your spooky design. Create your own or find inspiration from the many websites dedicated to pumpkin prettying. Secure your chosen style to the front of your pumpkin and carefully trace the image by poking holes along the lines. Once finished remove the template and gently carve. Voilà!

3. Create some eerie shadows by carving another pattern into the back of your pumpkin. Place next to a wall, light from the inside and watch your design come to life.

4. Put some flame-retardant coloured tissue paper just behind the front face of your pumpkin to create a coloured filter. Make sure you’re lighting your pumpkin with a torch rather than a naked flame though!

5. Try shaving parts of your pumpkin rather than cutting all the way through. This will give your design a two-tone effect and add depth.

6. Use everyday items from around the house to bring your pumpkin to life. Create a face from nuts and bolts, use white reflective tape as bandages or simply chop off the top and add flowers for your own spooky vase!

7. Painting your pumpkin can work wonderfully, especially if you want to keep little hands away from sharp objects. They’ll also look great in the daytime. Either paint on a design or use to add accents to an already carved squash.

8. Shun the traditional orange pumpkin for a ghoulish green variety… or why not try your hand at transforming a watermelon? The process is the same but it will certainly make your neighbours look twice!

9. Make your pumpkin shine from the inside out. Use multicoloured Christmas lights to add a new dimension to simple styles or try a red bicycle light, set to flash, for a really sinister touch.

10. Funny faces and ghoulish grins not your thing? Try making simple shapes like stars or spooky creatures with cookie cutters or use an apple corer or drill bits to add polka dots for a more grown-up pumpkin.

Wondering what to do with the leftovers of your creation? Put them to good use in our perfect pumpkin recipes

What are your top pumpkin carving tips?

Always take care when using sharp objects and open flames and always use electrical appliances in line with manufacturer’s instructions

by Roxanne Fisher – Writer/Sub-editor, bbcgoodfood.com 

www.bbcgoodfood.com/blog/582-pumpkin-carving/

Safety Around Halloween

September 21st, 2012

The Halloween Code

  1. Always go Trick or Treating with an adult
  2. Only go to houses where you, your friends or your parents know the residents
  3. Don’t knock on doors where there is a “No trick or treat” sign on display
  4. Always carry a torch and stay within areas that are well lit
  5. Stay with your friends – don’t split into smaller groups unless an adult goes with you
  6. Don’t talk to strangers on the street
  7. Don’t enter anybody’s house – always stay on the doorstep in the light
  8. Be careful not to frighten anybody, such as the elderly or those younger than yourself
  9. Be visible at all times so that road users can always see you
  10. Look carefully when crossing the road, even when you’re part of a group

Sliding Patio Doors or Exterior French Doors? | An Ordering Guide

June 27th, 2012

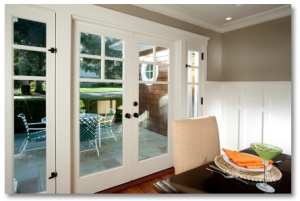
With the right patio doors, you can incorporate the beauty of your outdoor space into the design of your indoor space. Glass doors provide a view to the outside and can even serve as a design element themselves. You have two options when it comes to ordering glass patio doors: sliding and French.

Sliding Glass Patio Doors

While traditional two-panel sliding glass doors remain readily available, other options now exist. You can choose to install three panels, four  panels or more, depending on the manufacturer, and in any number of sizes. The panel configuration also can be customized. Pocket panels slide into the wall and disappear completely from view. Stacked panels, on the other hand, slide and stack within the frame of the door. With the stacked configuration, you even can choose to have the outermost panels slide toward the center, creating two openings in the doorframe.

Sliding glass patio doors come in wood, vinyl, fiberglass, steel, and aluminum frames, and you can add grills to the glass to create a windowpane effect. The number of interior and exterior finishes proves seemingly endless, allowing you to easily customize doors to match or complement existing interior and exterior design elements.

In terms of the glass itself, you can choose from single and double panes, with the latter being the standard as it provides greater energy efficiency, of course. You can also opt to temper, tint and/or obscure the glass on sliding patio doors. Tempered glass proves stronger than regular glass and when broken shatters into pebble-sized particles, not into slivers. Tint comes in a variety of colors, such as bronze, gray and green among others. And obscured glass comes in many patterns, including cascade, fern and reed. One manufacturer, Anderson, even offers art glass that features decorative panels between the glass panes. The company makes three series of this art glass: Frank Lloyd Wright, Classic and Historic. If you wish to make your sliding glass patio doors a design element themselves, an art glass pattern exists to suit your current architectural style and décor.

Exterior French Doors

Just like sliding glass patio doors, exterior French doors  hinged glass doors that work like conventional doors but swing open to the exterior — now come in additional designs. The traditional two-door setup remains popular, but manufacturers now also make French doors with additional glass panels on each side to further expand the view. The door configuration also can be customized, allowing the doors to fold upon opening, much like a folding closet door.

Exterior French doors typically come in wood, fiberglass or steel. A variety of finishes, decorative panels and glass options also are available with these types of doors.

Deciding Between the Two

While the style of door currently leading to your patio may heavily influence your decision, it need not. A professional handyman can easily convert an opening with sliding glass patio doors to accommodate French doors, and the opposite holds true. Choose the style that best fits into the architectural style and décor of your home. For example, charming French doors work well for a Craftsman-style home or cottage, but a more modern dwelling with an amazing view would benefit from sliding glass patio doors with more than just two panels.

If the thought of replacing existing sliding glass patio doors or external French doors sounds like too big of a project right now, consider refurbishing your existing doors. Another excellent job for a handyman, the project can be done in no time at all and at a fraction of the expense of replacement doors. You can choose to simply repaint the frame, or you can have the glass replaced, as well, to improve energy efficiency in an older home.

This article is part of the Deck Repair and Maintenance Series

Mr. Handyman can maintain your home to save you money. One call really does take care of everything on your to-do list. Make sure to stay on top of all your household repairs, improvements and maintenance needs and request service in your area.

Wood Rot Repair | 10 Places to Check for Potential Wood Rot

June 19th, 2012
What is Wood Rot?
It helps to understand what causes wood decay, so you can more easily spot it. Fungal colonies are the culprit, and two classes of wood rot exist. One results in a brown discoloration and crumbly appearance, lending it the name “brown cubical rot.” The other has a white or yellow look, and the wood becomes stringy or spongy. The fungi grow when dry wood comes into contact with moist soil or repeated condensation, such as from leaking plumbing or downspipes. Fungi also can extend for 30 feet or more across non-wood substances to wood.

10 Places to Look for Wood Rot

Several spots in and on your home lend themselves to the potential for wood rot. Regularly check the following areas to catch the fungus before it does serious damage:
  1. Attic — A leak in your roof can allow water to seep in, causing fungi to grow. Improperly vented dryer or exhaust fans also can cause condensation to form, creating the potential for wood rot.
  2. Under Sinks — Check under sinks in both the bathrooms and kitchen for leaking pipes. If not caught early enough, a leak can result in wood rot in the cabinet floor and subfloor beneath.
  3. Basement — Improperly graded landscaping surrounding your home can cause water to collect around the foundation and potentially seep into your basement, where it can come into contact with structural and surface wood.
  4. Windowsills — Sweating windows can create conditions perfect for wood rot in windowsills, both inside your home and out.
  5. Thresholds — Check for signs of wood rot on thresholds near exterior doors; don’t forget any sliding glass doors in your home, where water can seep into the tracks.
  6. Steps & Stoops — If your home has wooden steps, or a stoop not only exposed to the elements but near moist soil, inspect the areas regularly.
  7. Decks — Look for signs of wood rot on any posts or other parts of the structure in contact with soil.
  8. Eaves — Improperly installed roof flashing, a roof leak or clogged gutters create conditions ripe for wood rot.
  9. Wood Siding — Regularly inspect this most important part of your home for signs of wood decay.
  10.  Fences — Check along the bottom of the fence line, including posts and gates.

As mentioned above, wood rot can result in extensive and costly repairs when not caught early. A professional carpenter can thoroughly check your home, inside and out, for signs of wood rot and make any necessary repairs.

A professional handyman also can point out areas with potential for fungi growth and provide prevention solutions. Preventative measures — such as structural changes to your home and surrounding areas, plumbing repairs and chemical treatments — prove far less costly than repair or replacement.

Related Posts:

Wood Rot Repair

Methods to Prevent Damage from Water Intrusion

Mr. Handyman can maintain your home to save you money. One call really does take care of everything on your to-do list. All Mr. Handyman franchises are Fully Insured. Make sure to stay on top of all your household repairs, improvements and maintenance needs and request service in your area.

Patio Repair and Deck Tips: Fix Concrete Cracks and Replace Wood Rot

June 19th, 2012

Warm weather has arrived, which means you are spending more time on your patio or deck. While out there, look for cracks in the concrete or signs of rotted wood, so that you can solve any small problems before they become big ones.

Photo Credit: Mr. Handyman of SE Tarrant County

Concrete Patio Maintenance and Repair
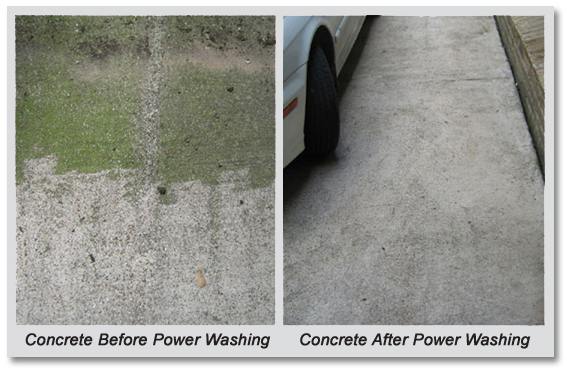
If your concrete patio remains free of cracks, it simply needs a good cleaning to get it ready for the increased foot traffic of summer. Power washing proves your best bet, and you will need a washer/nozzle combination that delivers 3,000 PSI or higher. You can rent a power washer from your local home improvement store, or you can turn this task over to your professional handyman. If you have never used a power washer before, consider outsourcing the job because a power washer in inexperienced hands can do serious damage. Also, your handyman will have the professional equipment and cleaning solutions necessary for best results.

Before the cleaning process begins, remove everything from the patio, including items hung on surrounding walls. Cover all electrical outlets with plastic sheeting and tape. Wet down nearby vegetation and cover it with plastic. You also will want to clear the area of anyone else; that means pets, too, who may mistake the power washer for the garden hose and injure themselves trying to play with the water. The person operating the power washer should wear gloves and safety goggles, as well.

If your concrete patio has developed cracks, you will still want to power wash it but in preparation for patching and/or resurfacing. You can fill small cracks with concrete filler, smoothing with a trowel before allowing it to dry. If the cracks are large and cover a wide area, you may want to resurface the entire concrete patio with the appropriate product. This also can be done as a DIY project, but it takes practice to leave a resurfaced patio without edge marks. Again, consider having your handyman perform this work for best results. No matter who does the job, allow the concrete patio to dry for six hours before walking on it. You also should seal or reseal the surface to protect the concrete from staining.

Wood Deck Maintenance and Repair
Before cleaning your deck for the season, inspect it thoroughly for dry rot. This fungus can spread through the wood, not only compromising the structural integrity of your deck but also attracting wood-eating insects such as termites. Look for spongy and discolored wood that will flake off when wet or poked with a screwdriver. If you do find dry rot, any affected wood will need to be replaced.

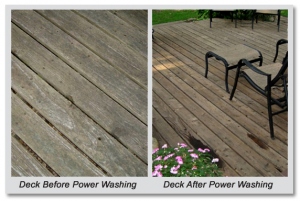
Power washing also benefits a wood deck, but you will need to use a washer/nozzle combination that delivers no more than 1,500 PSI to avoid damaging the wood. Again, turning this job over to your handyman proves the safest option and offers the best results. He also can help with the dry rot inspection and reseal your deck once all repairs and cleaning tasks are done; a sealant will protect the wood from UV rays and water. If you do decide to care for your deck in the tradition of DIY, this helpful article will take you through the multi-step process.

Regular maintenance and as-needed repair of your outdoor living spaces, whether a concrete patio or wooden deck, result in longer-lasting surfaces that prove both safe and enjoyable for your friends and family. It also helps you avoid costly repairs necessary for problems not dealt with in a timely manner. It will cost you thousands to replace a wooden deck with widespread rot, but only a fraction of that cost to repair rotted pieces of the deck, steps or railing.

Top 10 Father’s Day Gift Ideas for 2013

June 11th, 2012

With Father’s Day coming up this Sunday, you may be looking for some gift ideas for the Dad who loves to get things done around the house.  Or possibly for the dad that you WANT to get things done around the house.  We found some great things that your dad might like!  All for under £50!

1) The Gorilla Torch – This flashlight looks a little bit like an alien with magnetic feet and adjustable legs.  You might secretly expect it to start walking around on its own.  Just wrap it around something or stick it to something like a car and the light shines exactly where Dad needs it.  (£35)

2) Kobalt Multi-Drive Wrench – This looks cool, but you might not realize just how cool this actually is.  Dad will though!  This wrench works with 68 different fasteners, so instead of Dad having to carry around a 50 lb ratchet set, he can just use this one thing!  (£20)

3) Black & Decker Laser Level – Maybe Dad has an old laser level, but does he have one that changes laser color from red to green when it’s level?  One that can suction to the wall?  Old laser levels sometimes required you to make a small hole in the wall to secure them. Not this one!  (£10)

4) Kobalt Flexible Head Ratchet Screwdriver – Dad will feel like Dirty Harry with this thing!  It comes with a holster and cartridges that slide  in the screw bit of your choice.  There is definitely a fun factor with this tool.  If you get this for your father, he will likely sit there for a while, messing around with it.  Yep, it’s like a toy for Dads.  (£20)

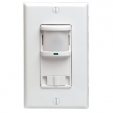
5) Occupancy Sensing Light Switch – For the dad who likes to ask “What, do you think we own stock in the electric company?”  This automatically turns off lights when nobody is in the room.  This can reduce your electric bills, which will surely put a smile on Dad’s face!  (£28)

6) Contour Master Customizable Area Sprinkler – Most yards are not perfectly square.  Dad can set up this sprinkler to spray different distances to properly water the entire yard!  This can save water, since he won’t be watering the driveway or street!  (£20)

7) The Nifty Nabber – This tool is like an extendable arm with a built-in claw and magnet to grab something just out of reach.  We suspect dads might go around looking for things that need grabbing, just so they can play with this.  (£15)

8 ) 3M WorkTunes – Show Dad that you care about his hearing with WorkTunes: ear protection and music in one!  He can listen to the radio or attach his iPod.  Warning:  Might make Dad boogie a little while he is mowing the grass or using his power tools. (£50)

9) Frogg Toggs Chilly Pad Cooling Towel – Whether Dad is working around the house or relaxing in the backyard, this towel will keep him cool!  Just wet it down and it cools without getting clothes wet!  It kind of seems like magic.  Dad’s friends will be envious.  (£13)

10) Mr. Handyman Gift Certificate – Yes, lucky for us, not all fathers like to do their own home improvements.  For them, we recommend a Mr. Handyman gift certificate.  Then everybody is happy!

Once you figure out what the fathers in your life will like best, use a nice metal bucket as a sparkling gift basket! Dad can use it later as a patio cooler for his favorite beverage.  Happy Father’s Day!

Gutter Hedghog | Leaf Defier Keeps Leaves Out and Gutters Clean

June 8th, 2012

The Amazing Hedgehog Gutter Brush video!

So many reasons exist to keep gutters clear of debris. When a gutter gets clogged, water can drain down the side of your home, causing unsightly water marks at best and serious damage to exterior surfaces and the foundation at worst. Water also can drain into your home, resulting in costly drywall repairs to ceilings and walls. And after a while, the weight of the debris itself becomes an issue, as an overloaded gutter can pull away from your home and come crashing down and into a window.

Despite these many dangers, odds are you have put off cleaning your gutters a time or two because of the unpleasantness of the task. Not only must you climb a ladder to remove the debris, only a certain amount sits within reach, causing you to climb down the ladder and back up again every few feet. Depending on the length of your gutters, this could take hours of your precious free time.


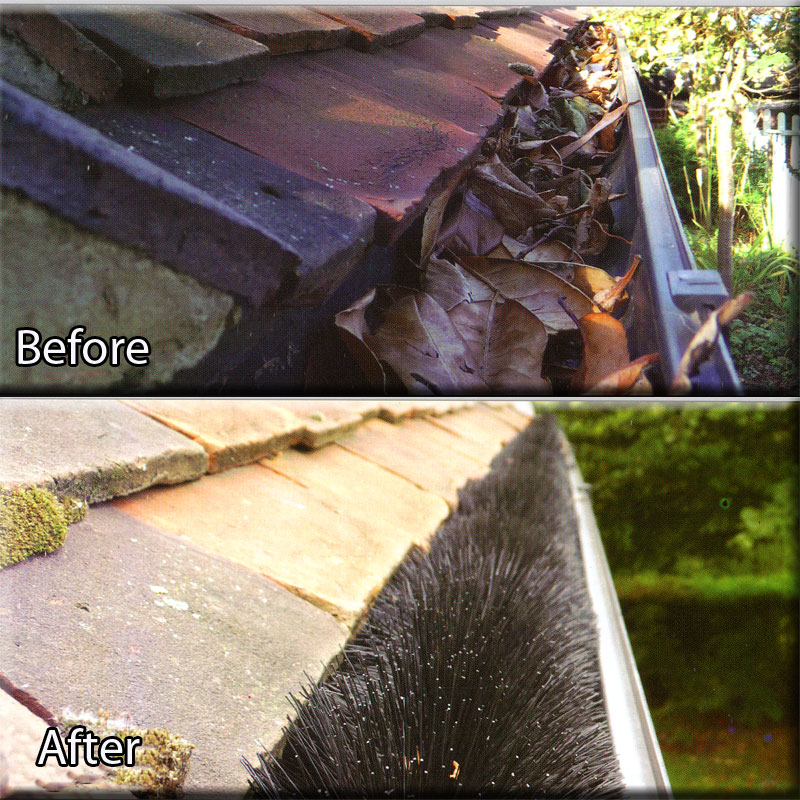
Imagine never having to clean your gutters again. Simply ask Mr. Handyman to clear the debris for you and install a Gutter Hedghog® on each of your gutters. This helpful device is cut to fit snugly in your gutter. Its design causes water to flow through the insert, into the gutter valley and out the downspout. Debris, such as twigs and leaves, slide off the  surface during rainfall or eventually dry up and blow away.

Mr. Handyman recommends and installs the Gutter Hedghog®. We have seen first-hand how it works while withstanding heat, ice and heavy rainfall.  And because it fits inside the gutter, it does not detract from the beauty of our clients’ homes.
As you work your way down this year’s spring-cleaning to-do list, consider assigning this task to Mr. Handyman. Installing a Gutter Hedghog® in each of your home’s gutters requires not only clearing all gutters, but also checking the gutter system itself to ensure the success of the product. We can perform any repairs needed before beginning installation, which requires measuring your gutters and adapting the product to allow for proper drainage.

A product such as this one will protect your home for years to come and cross an unpleasant task off your spring-cleaning to-do list for good. And while on the subject of that list, keep in mind the many jobs Mr. Handyman can perform while at your home. From installing attic insulationthat increases the energy efficiency of your home to window repair and installation, we have the skills needed to be your one-stop shop for home improvement.

Mr. Handyman can maintain your home to save you money. One call really does take care of everything on your to-do list. All Mr. Handyman franchises are Fully Insured.  Make sure to stay on top of all your household and commercial repairs, improvements and maintenance needs and request service in your area.

Patio Building | Design Ideas for Concrete, Brick or Wood Patios

June 8th, 2012

Building an addition onto your home requires a significant investment of time, patience and money. Savvy homeowners who simply want more living space opt for transforming an outside area instead. The cost comes in considerably lower, and the amount of patience and time required depends on whether you go the DIY route or ask your professional handyman for help. One of the first decisions you must make about a new patio involves the surface itself. Several options exist, whether you have dirt and weeds to start with or an already-poured concrete surface. Let’s take a look at the available materials:

Photo Credit: SupremeCrete on Flickr

Concrete
If your home already has a concrete slab in the patio area, you can dress up the design by stamping it to resemble pavers. A simple design will involve one color, while an intermediate may involve multiple colors and perhaps a contrasting border. An advanced design may include borders, saw-cut designs and hand-applied chemical stain accents. As you can imagine, when the design increases in complexity, so does the cost. You also can opt to install a concrete slab where none existed before, but you will need to wait the appropriate amount of time for it to fully form before starting a stamping project; this typically takes 28 days.

You also can have a boring concrete slab removed, or start from scratch, and then install actual concrete pavers in the patio area. Pavers come in a variety of shapes and colors, allowing you to create a look that complements the architecture of your home.

In general, concrete pavers last longer than a poured slab, as they stand up to weather better and require little maintenance. You can easily replace one cracked paver out of hundreds that make up the patio surface, but a cracked slab needs to be broken up and repoured.

Another inexpensive option when it comes to concrete involves creating pavers using a form. You simply place the form, then pour the concrete into the form and smooth over. After five minutes, you pull up the form and replace in an adjacent area. You can even color the concrete during the mixing process to customize the look. Forms come in several shapes, including brick and cobblestone, and multiple patterns.

Photo Credit: Gregs Landscaping on Flickr

Brick
Brick pavers have many of the benefits of concrete pavers but come in a more limited number of shapes and colors, mostly shades of red, brown and gray because the clay used determines the color. You can create design patterns from simple to complex for your patio area, just as you can with concrete pavers. Maintenance proves similar to that of concrete pavers, as well.

Photo Credit: Merlene on Flickr

Stone
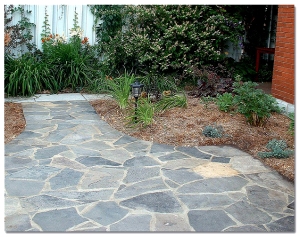
Unlike concrete and brick, stone pavers already exist in nature. Bluestone, limestone and flagstone are among the many options if you want to create an outdoor living space that has old-world charm. Typically a square or rectangular shape, they can be placed in a variety of patterns, including herringbone, basket weave and running bond, as well as and ashlar, which involves using different sizes of stone pavers. They also prove resilient to weather conditions and require little maintenance.

Wood
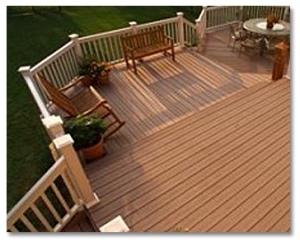
Wood doesn’t just suit decks, it also works well for patios in certain areas of the country. Check out this recent post about building a deck for not only design ideas but also for information about building codes and costs.

When deciding which material to use and in what design, your handyman can provide his expert opinion about what works — and looks — best in your area of the country.

This article is part of the Deck Repair and Maintenance Series

Mr. Handyman can maintain your home to save you money. One call really does take care of everything on your to-do list. All Mr. Handyman franchises are Fully Insured. Make sure to stay on top of all your household repairs, improvements and maintenance needs and request service in your area.

Building a Deck | Ideas, Free Deck Plans, Plus Building Codes and Costs

June 7th, 2012

Gone are the days when a simple wood deck supported a grill, patio furniture and perhaps a few potted plants. Today’s decks come in a variety of decorative designs and serve as outdoor living spaces, complete with dining pergolas and sunken hot tubs. If you plan on adding a deck to your home for relaxing and entertaining purposes, keep the following in mind:

Design — You won’t need to hire an architect to design this addition to your home, as dozens of websites offer deck building plans free of charge.

For example, Decks.com has more than 80 different deck plans available for download, and each one comes in multiple preset sizes. They range from basic wood decks in square and rectangle shapes to more elaborate decks in multiple shapes and with multiple levels and areas.

DeckPlans.com also offers deck building plans free of charge. Regular wood decks come in rectangular and octagonal shapes, and pool decks come in three different layouts. You can customize the size of the plans from DeckPlans.com, and the website also offers plans for multiple types of railing.

Once you select a deck building plan, either website will send you the plan and materials (framing, decking and railing) list, with DeckPlans.com also including a cost estimator. Your best bet involves requesting plans for three favorite setups, then meeting with your professional handyman to help you make a final choice. He can advise you as to which deck will be the best fit for your home. And, unless you do this sort of work professionally, he can take on the task of actually building the deck itself.

Cost — Once you pick out a deck design and discuss the project with your handyman, you must determine whether or not you can afford what you have planned. In addition to the cost estimator built into the free plans offered by DeckPlans.com.

If your favorite plan does look like it will cost more than you expected or wanted to spend, keep in mind that a deck will add to your home’s property value. Robert Markovich, home and yard editor for Consumer Reports states that adding a deck can be a smart way for homeowners to maintain or even improve their home’s value. He said, “It’s safe to say that a deck is one of the more cost-effective things you can do. Decks are really a high-return item.” The article went on to state that 85 percent of the cost of building a wooden deck could be recouped during resale, while a bathroom remodel came in at 78 percent, and a family room addition at 69 percent.

Once the deck goes up and becomes your family’s favorite space, be sure to properly maintain it year-round. Cleaning, checking connections and re-staining when necessary help keep your deck looking like new. Elsewhere on this blog, you will find plenty of articles — and even a video — pertaining to deck repair and maintenance, all projects Mr. Handyman would be more than happy to take on for you.

This article is part of the Deck Repair and Maintenance Series

Mr. Handyman can maintain your home to save you money. One call really does take care of everything on your to-do list. All Mr. Handyman franchises are Fully Insured with General Liability and Workers Compensation. Some services are subject to state and local licensing and may not be available in all locations. Make sure to stay on top of all your household repairs, improvements and maintenance needs and request service in your area.